Categories
Members STEM

Simple Machines for Kids

Explore Simple Machines for Kids: Hands-On STEM Learning

These simple machine projects are an engaging and hands-on way for kids to learn the science behind simple machines! Discover how simple machines make work easier, explore everyday examples, and try your hand at designing and building your own simple machine. These activities are perfect for elementary and middle school students, sparking curiosity and fostering problem-solving skills.

Why Build Simple Machines with Kids?

Building simple machines is a fantastic way to help kids understand the mechanics behind how things work. These easy STEM activities provide high-impact learning opportunities while keeping the materials simple and accessible—many projects can be done using recycled items or inexpensive supplies!

By working on these activities, kids gain:

  • A deeper understanding of forces and mechanical advantage.
  • Valuable problem-solving and critical-thinking skills.
  • Opportunities to brainstorm, troubleshoot, and create innovative solutions.

What Are Simple Machines?

Simple machines are basic mechanical devices that make tasks easier by altering the force required to perform work. They provide a mechanical advantage, allowing us to lift, push, or move objects with less effort.

There are six main types of simple machines:

  1. Lever
  2. Wheel and Axle
  3. Pulley
  4. Inclined Plane
  5. Wedge
  6. Screw

These simple machines are often combined to form complex machines used in everything from construction to everyday tools. Understanding them is key to grasping engineering, physics, and problem-solving concepts.

How Do Simple Machines Make Work Easier?

Simple machines reduce the force needed to perform tasks by:

  1. Changing the direction of the applied force (e.g., pulleys).
  2. Multiplying the input force (e.g., levers, gears).
  3. Spreading the force over a longer distance (e.g., inclined planes).

For example:

  • Like a seesaw or crowbar, a lever lets you lift heavy objects with less force.
  • A pulley system redirects force, allowing you to easily lift objects vertically.
  • An inclined plane reduces the effort needed to move objects by increasing the distance over which the force is applied.

Examples of Simple Machines in Everyday Life

Simple machines surround us and are vital to our daily lives. Here are real-life examples to spark recognition and curiosity:

1. Lever

  • Seesaws and scissors are classic examples of levers.
  • Bottle openers make it easy to pop off caps.
  • Hammer claws are used to pull out nails effortlessly.
  • Light switches operate as levers to turn lights on and off.

2. Wheel and Axle

  • Bicycle pedals use a wheel and axle system to transfer force from your feet to the wheels.
  • Rolling suitcases make heavy loads portable.
  • Doorknobs allow us to open doors with minimal effort.
  • Rolling pins help evenly flatten dough in baking.

3. Pulley

  • Elevators use pulley systems to lift and lower cabins.
  • Window blinds are made easier to open with small pulleys.
  • Flagpoles let you raise and lower flags.
  • Construction cranes lift heavy materials using advanced pulley systems.

4. Inclined Plane

  • Wheelchair ramps make buildings accessible without requiring much lifting effort.
  • Slides are fun examples of inclined planes that use gravity to move objects down.
  • Moving ramps in loading docks or trucks assist in transporting heavy items.
  • Driveways often incorporate a slant, making it easier to push objects up.

5. Wedge

  • Knives and axes split or cut materials with less effort.
  • Nails and screws penetrate surfaces to hold things together.
  • Doorstops prevent doors from moving.
  • Shovels use wedge edges to cut into the ground.

6. Screw

  • Jar lids twist easily to open or close jars.
  • Bolts secure objects tightly.
  • Bottle caps ensure that the contents stay sealed.
  • Corkscrews use a screw mechanism to remove corks from bottles.

7. Compound Machines (Combinations of Simple Machines)

  • Bicycles use wheels, axles, pulleys, and levers.
  • Wheelbarrows combine levers and wheels to carry heavy loads.
  • Can openers combine levers, wedges, and wheels for efficient opening.
  • Scissors use levers and wedges to cut materials easily.

Simple Machine Projects for Kids

Here’s a list of creative and exciting projects that combine fun with learning. Each project includes detailed instructions and free printables!

1. Archimedes Screw

Build a working water screw inspired by Archimedes. This classic project teaches kids about inclined planes and rotational motion.

2. Balloon-Powered Car

Use the force of air to power a car and explore how wheel and axle systems work. Experiment with different designs to maximize speed and distance.

3. Candy Gears

Create a gear train using candy and observe how gears transfer motion and change rotational speed.

4. Catapults

Build levers with various materials (craft sticks, pencils, LEGO) and test their ability to launch objects. A great introduction to the concept of mechanical advantage!

5. Pulley Systems

Build a functional pulley system to lift objects. Try variations like outdoor pulleys or a PVC pipe pulley system.

6. Rubber Band Cars

Explore potential and kinetic energy by building cars powered by rubber bands. Modify designs to improve performance.

7. Snow Shovel STEM Challenge

Build a snow shovel from simple materials, like cardboard and craft sticks, and use it to scoop up “fake snow.” This challenge demonstrates how a lever can lift and move materials. Add extra fun by creating a contest to see who can design the most effective snow shovel or lift the most “snow” in one scoop!

8. Ramp STEM Challenge

Design and test a ramp to explore the principles of an inclined plane. Suggestions:

  • Toy Car Races: Build ramps of different angles and materials to observe how incline affects speed and distance.

Extend the Learning

  • Real-World Applications: Discuss how construction equipment, vehicles, and household tools utilize simple machines.
  • STEM Career Exploration: Highlight careers in engineering and design that rely on the principles of simple machines.
  • Creative Challenges: Have kids design their own inventions, combining multiple simple machines to solve everyday problems.
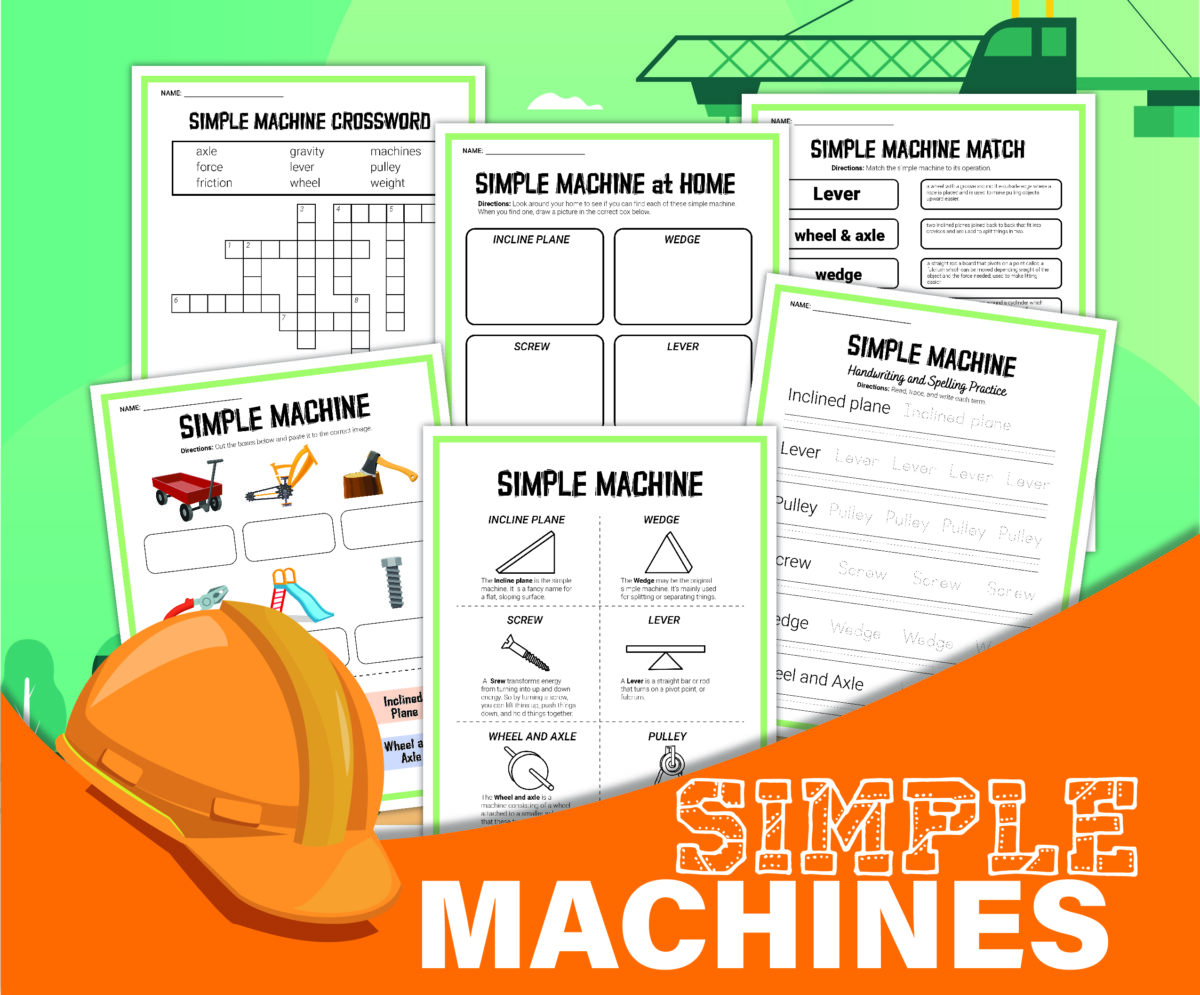
  • Interactive Worksheets: Download our simple machine worksheets with hands-on activities and reflection pages to reinforce learning.

Categories
Members STEM

Understanding Variables in Science


What Are Scientific Variables?
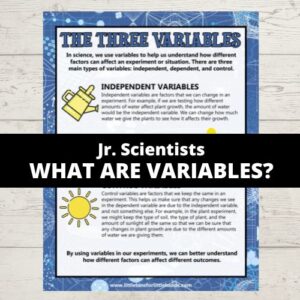
In science, variables are any factor that can be changed in an experiment to help us understand how different factors can affect an experiment or situation. Specifically, three different variables help us answer the question we are investigating. Identifying these variables before you start will guide your decisions about how to conduct your experiment and how to measure the results.

💡 We use variables when we apply the scientific method to our experiments.

Three Types of Variables

The three kinds of variables are independent, dependent, and controlled variables. You want to implement variables in any scientific investigation to ensure a fair test.

💡 Let’s use our Plant Growth Experiment as an example to understand the variables better.

Independent Variable

In a science experiment, the independent variable is the factor you will change. This variable affects the dependent variable. You can identify the independent variable by looking at what can exist in differing amounts or types and what is directly related to your experiment’s question. 👉 For example, if you are testing how different amounts of water affect plant growth, the amount of water would be the independent variable. You can change how much water you give the plants to see how it affects their growth.

💡 Remember, choose only one independent variable for your experiment!

Dependent Variable

The dependent variable is the factor that you observe or measure in an experiment. It is the variable that is affected by changes made to the independent variable. Note: the number of dependent variables can be more than one. 👉 The dependent variable would be the plant’s growth. We are measuring the plant’s growth to see how it is affected by the volume of water it is given.

Controlled Variables (Constant Variables)

Control variables are the factors that you keep the same in the science experiment. This helps ensure that any changes in the dependent variable are due to the independent variable and not something else. With some experiments, you may choose to set up a control that has no amount of the independent variable added to it. All other factors are the same. This is great for comparison. 👉 For example, in our plant growth experiment you would keep the type and amount of soil, including the type of fertilizer, the type of plant, and the amount of sunlight, all the same, so that you can be sure that any changes in plant growth are only due to the different amounts of water you give them. You could also have one plant that you give no water.

Grab the printable science project variables sheet!

Variables and Writing A Hypothesis
Choosing variables is essential for writing a good hypothesis because variables help you define what you are testing and observing in a science experiment. A hypothesis predicts how one variable (the independent variable) affects another (the dependent variable). It explains the relationship between the independent and dependent variables.

💡 Learn more about how to write a good hypothesis for kids.

Categories
Members STEM

Writing a Hypothesis With Kids

When you begin exploring a science topic, one of the first steps in the scientific method is making a hypothesis. But what exactly does that mean? Let’s break it down and learn how to write a simple hypothesis for kids. Use it in your next science experiment, and understand the key parts that make a hypothesis testable!

What Is a Hypothesis for Kids?

hypothesis is more than an educated guess about what will happen during an experiment. It’s your prediction based on the information you already know. A hypothesis is part of the scientific method, where you make a guess and then test that guess through experimentation.

Why Use the Scientific Method?

It is a process or method of research to help solve a problem. Try incorporating it into your next science experiment with the helpful examples below. The scientific method helps us:
  1. Stay Organized: It gives us clear steps to investigate one thing at a time.
  2. Make Better Predictions: It helps us think carefully about what might happen (make a hypothesis) before we begin testing.
  3. Learn from Mistakes: If our experiment doesn’t go as planned, we can understand why and try again.
  4. Find Real Answers: The scientific method is a reliable way to find answers to questions based on what we observe, not just what we think or feel.

💡 Read more about the Scientific Method [here] and Variables in Science [here].

What Are the Scientific Method Steps?

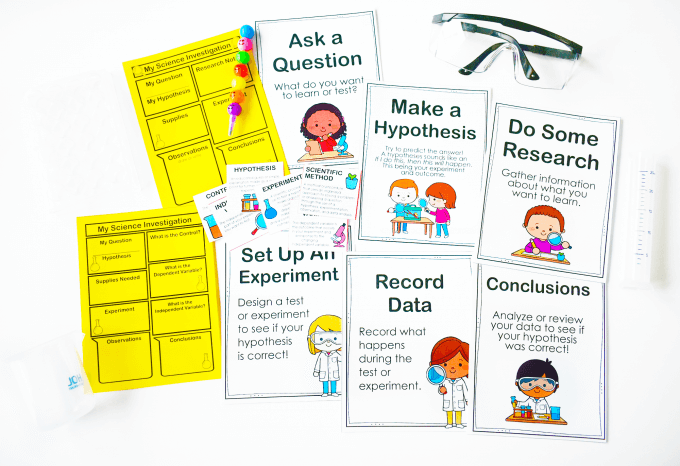
  1. Ask a Question Start by being curious! Ask, “What happens if I plant a seed in sand instead of soil?”
  2. Do Research Before jumping into an experiment, gather information. You can look in books, ask a teacher, or search the internet. Doing research helps you understand what others already know about your topic.
  3. Make a Hypothesishypothesis is not just an educated guess. It is an informed statement based on what you already know. After doing your research, you might predict, “I think the plant will not grow as well in sand as it does in soil.”
  4. Test the Hypothesis Now it’s time to experiment! Try planting seeds in both sand and soil and see what happens. This step lets you find out if your guess was right.
  5. Collect Data Write down what you observe. Maybe the plant in soil grows faster and taller than the one in sand. Keeping a journal or recording data helps you see patterns.
  6. Draw Conclusions Look at your results and decide if your hypothesis was correct. If it wasn’t, that’s okay! You’ve still learned something new.
  7. Share Results Scientists often share what they’ve learned with others. You might share your findings with your class or write a report. Keep a journal or notebook to refer back to for other experiments.

How Does Scientific Research Help?

Research is an important part of the scientific method because it helps us:
  • Build on What We Know: We can learn from what others have already discovered before experimenting.
  • Make Better Hypotheses: When we research, we make more informed predictions about what might happen during the experiment. We don’t just guess!

Why Should We Use the Scientific Method?

The scientific method isn’t just for scientists—it’s for anyone who wants to solve problems, answer questions, and learn about the world. By following these steps, we can:
  • Think critically about what we’re investigating.
  • Test our ideas in a fair and organized way.
  • Learn from our experiments and improve our understanding.

💡 The scientific method teaches us that even if our hypothesis is wrong, that’s still valuable! Every experiment is a chance to learn something new, making science fun and exciting for all ages.

How to Write a Simple Hypothesis for Kids

You can follow this easy format to write a simple hypothesis with kids:

💡 “If [I change this], then [this will happen].”

For example:
  • If I add more water to the plant, then it will grow taller.
  • If I heat the water, then the candy will dissolve faster.
When you make a hypothesis, you need to consider the variables in your experiment. A variable is anything that can change in the experiment. There are different types of variables to consider:
  • Independent Variable – This is the part of the experiment you change on purpose. For example, the amount of water you give a plant.
  • Dependent Variable – This is the result you measure in response to the independent variable. For example, how tall the plant grows.
Add this helpful science information pack to your next science experiment!

Hypothesis for Kids Examples

Here are some examples of hypotheses that are grade-level appropriate:
  • Elementary school: “If I use warm water, then sugar will dissolve faster than in cold water.”
  • Middle school: “If I increase the density of the liquid, then the object will float higher.”

💡By focusing on the independent and dependent variables, you’ll create a clear and testable hypothesis.

Using a Hypothesis with Young Kids

You can introduce the idea of hypotheses to young kids and even preschoolers! While the concept needs to be simplified, young children are naturally curious and already make guesses about how things work in their everyday play. By guiding them to think of these guesses as predictions they can test, you can start teaching them the basics of a hypothesis.

How to Introduce Hypotheses to Preschoolers

For young children, using language they understand is key. Instead of saying “hypothesis,” you might say:
  • “What do you think will happen?”
  • “Let’s make a prediction.”

Simple Steps to Writing a Hypothesis with Preschoolers

  1. Start with a question: Ask them something simple and observable, like “What do you think will happen if we add water to the sand?”
  2. Make a prediction: Encourage them to say what they think will happen. For example, “I think the sand will get wet and sticky.”
  3. Test it: Let them try the simple science experiment to see if their prediction was right.
Download these pages here.

Simple Science Experiments for Hypotheses

Here are some great science projects where you can practice writing a hypothesis and testing it through experimentation:
Plant Growth Experiment: Observe how different amounts of light affect plant growth. You might write a hypothesis like: “If I put the plant in more sunlight, then it will grow faster.”
Paper Towel Absorbency Test: Compare different brands of paper towels to see which absorbs more water. A hypothesis example could be: “If I use Brand X, then it will absorb more water than Brand Y.”
Floating and Sinking with Density: Test how different liquids (like water and oil) affect the ability of objects to float. Write a hypothesis such as: “If I place the object in oil, then it will float higher than in water due to the difference in density.”

Categories
Members STEM

Scientific Method For Kids

The scientific method is foundational to understanding the world and solving problems through experimentation and observation.

Scientific Process

Whether you teach elementary or middle school, introducing the steps of the scientific method can spark curiosity, develop critical thinking, and build a lifelong love for science. Below, we’ll explain:
  • What the scientific method is
  • How to teach the scientific method to kids
  • Fun, easy experiments for students to explore each step of the process.
Let’s make science engaging and accessible for all ages!

Note: The use of the Best Science Practices is also relevant to the topic of using the scientific method. Read more here and see if it fits your science planning needs.

What Is the Scientific Method?

The scientific method is a logical process for asking questions, testing ideas, and drawing conclusions. Scientists, including famous figures like Galileo GalileiIsaac Newton, and Charles Darwin, have used this method to make groundbreaking discoveries in physicsbiology, and chemistry. The scientific method involves:
  1. Making observations about a phenomenon.
  2. Asking a question.
  3. Forming a hypothesis (a possible explanation or prediction).
  4. Conducting an experiment to test the hypothesis.
  5. Recording results and drawing conclusions.
  6. Communicating findings.
Young learners can grasp these concepts by simplifying each step with real-world examples and fun activities. Teachers can adapt the method to different ages and subjects, including social sciences, economics, and environmental studies.

Key Steps of the Scientific Method

Here’s a breakdown of the steps of the scientific method, complete with classroom-friendly examples and tips:

Step 1: Make Observations

Encourage students to use their senses to observe the world. Observations may include what they see, hear, or feel.
  • Example: “What happens to an ice cube when left in the sun?”
Teaching Tip: Introduce tools like magnifying glasses, thermometers, and measuring cups to enhance their observations.

Step 2: Ask a Question

Ask questions that build on student observations.
  • Example: “Does ice melt faster in saltwater or freshwater?”
Teaching Tip: Guide students to form specific questions. Use prompts like, “What do you want to learn?” or “What would happen if…?”

Step 3: Form a Hypothesis

Explain that a hypothesis is not just a guess but a prediction based on background research and observations.
  • Example: “I think ice will melt faster in saltwater because salt lowers the freezing point of water.”
Use background research tools like books, articles, or videos to help students understand concepts. Teaching Tip: Remind students that their hypothesis doesn’t need to be correct—science is about learning from results!

💡 Learn more about how to form a hypothesis for kids [here].

Step 4: Conduct an Experiment

Design experiments that change one independent variable at a time while keeping controlled variables constant. Measure the impact on the dependent variable.
  • Example: Testing ice melting times in different liquids.
    • Independent Variable: Type of liquid (water, juice, saltwater).
    • Dependent Variable: Time taken for the ice to melt.
    • Controlled Variables: Liquid temperature, ice cube size, and container size.
Teaching Tip: Discuss the importance of reproducibility in science—conduct experiments multiple times for accuracy.

💡 Learn more about dependent and controlled variables [here].

Step 5: Record Results and Draw Conclusions

Teach students to observe and document data carefully.
  • Record results in journals using charts, graphs, or drawings.
  • Example: The ice in saltwater melted faster than the ice in freshwater.
Encourage reflection:
  • Was their hypothesis supported?
  • What did they learn?
Teaching Tip: Use tools like printable worksheets for easy data recording.

Step 6: Communicate Results

Have students share their findings through:
  • Presentations
  • Posters
  • Simple scientific journal entries
Teaching Tip: Celebrate student work! Discuss how communication helps scientists learn from each other and build on discoveries.

💡Learn how to make a science fair board with free printables.

Fun Scientific Experiments

Here are easy, hands-on experiments to reinforce each scientific method step. These are perfect for elementary and middle school classrooms.

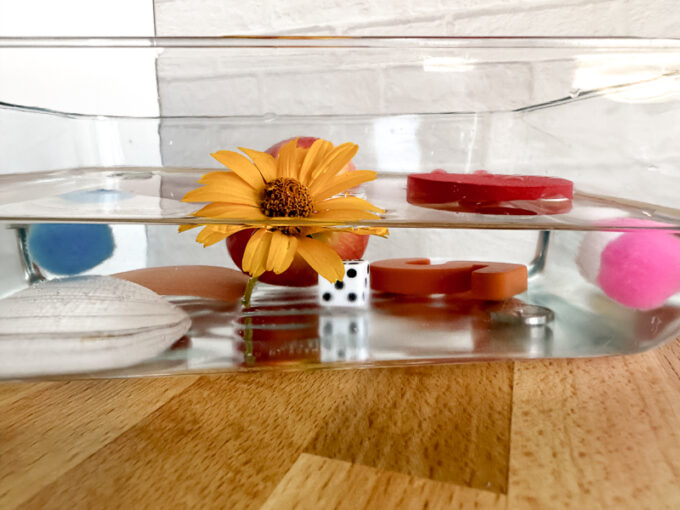
1. Sink or Float Experiment

Explore predictive power and buoyancy:
  • Materials: Various objects, a tub of water.
  • Question: “Will this object sink or float?”

2. Apple Browning Experiment

Teach students about oxidation and variables:
  • Question: “Which substance prevents apples from turning brown?”
  • Variables: Lemon juice, water, vinegar, and oil.

3. Magic Milk Experiment

Investigate surface tension and relativity:
  • Materials: Milk, dish soap, and food coloring.
  • Question: “How does soap affect food coloring in milk?”

4. Paper Towel Absorbency Test

Introduce hypothesis testing and data collection:
  • Question: “Which brand of paper towel absorbs the most water?”
  • Measure water absorbed to determine the best paper towel.

5. Freezing Water with Salt

Explore temperature regulation:
  • Question: “How does salt affect the freezing point of water?”
  • Compare results with and without salt.

6. Catapult Experiment

Introduce engineering principles:
  • Build a simple catapult with popsicle sticks.
  • Question: “How does changing the angle affect the distance?”

7. Viscosity of Liquids

Teach about fluid properties:
  • Materials: Honey, oil, water, and marbles.
  • Question: “Which liquid allows a marble to fall the fastest?”

8. What Colors Absorb Heat?

Explore how color impacts heat absorption:
  • Materials: Different colored paper, a lamp, and thermometers.
  • Question: “Do darker colors absorb more heat than lighter colors?”
  • Compare temperature changes on papers exposed to light.

9. Newton’s Laws in Action

Demonstrate Newton’s Laws of Motion:
  • Experiment: Build a simple balloon rocket.
    • Question: “How does force and mass impact the distance traveled?”
  • Discuss action-reaction forces, acceleration, and motion.

10. Balloon Inflation with Baking Soda and Vinegar

Teach about chemical reactions and gas production:
  • Materials: Balloon, baking soda, vinegar, and a bottle.
  • Question: “How much gas is produced when mixing baking soda and vinegar?”
  • Observe the balloon inflating as carbon dioxide gas forms.

11. Plant Growth Experiment

Investigate the factors that affect plant growth:
  • Materials: Seeds, soil, pots, water, and light sources.
  • Question: “How does the amount of sunlight affect plant growth?”
  • Variables: Test plants with varying amounts of sunlight (full sun, partial shade, no sunlight).

Why Teach the Scientific Method?

The scientific method empowers students to think like scientists and apply problem-solving skills in real-world situations. It nurtures:
  • Logical thinking
  • Deduction and reasoning
  • Reproducibility in experiments
Teaching the scientific method aligns with Next Generation Science Standards (NGSS) and encourages inquiry-based learning, which fosters scientific curiosity and critical thinking.
Categories
STEM

Science Tools for kids

Does a scientist use tools? Yes! Scientists use tools to explore the world around them. Whether observing the stars with binoculars, measuring the weather, or studying life in a drop of water, science tools are essential for making discoveries and setting up simple science experiments!

Using Scientific Tools

Science is all about asking questions and exploring the world! Different types of scientists use various tools in their labs to measure, observe, and experiment to find answers to their questions.

💡 With these tools, young scientists can explore everything from biology and chemistry to physics and earth science. Through hands-on experiments and lessons, kids can dive into exciting exploration while learning about the world around them.

Recommended Grade Levels: This list of favorite science tools is perfect for elementary school students from kindergarten to 5th grade (even middle school). It’s a great introduction to simple, more advanced science equipment that kids can use safely. See Pre-K recommendations below.

Favorite Science Tools 

Go ahead and assemble a science kit with some of these tools! Add them to a science center with a specific theme or leave a few loose, such as a magnifying glass, for any observation time.

💡 Make sure to learn about the scientific method and variables to expand on your activities.

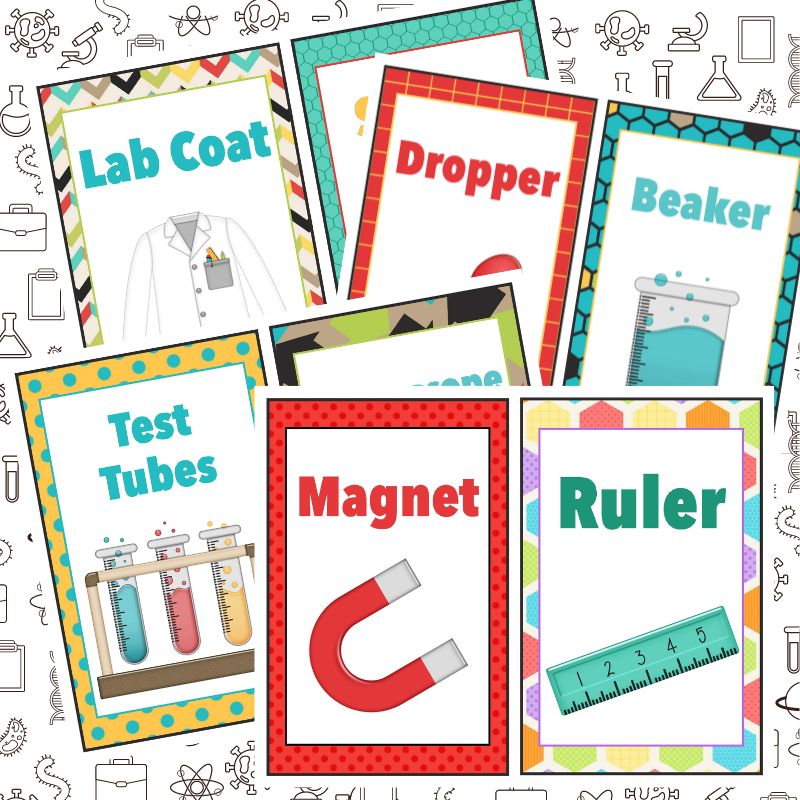
  • Test Tubes: Small glass containers used to hold liquids during experiments, especially in chemistry.
  • Microscope: A tool that helps you see things too tiny for the naked eye, like plant cells or water droplets—perfect for biology!
  • Beaker: A container used to mix or heat liquids during science activities.
  • Dropper: A tool for transferring small amounts of liquid, great for careful measurements.
  • Thermometer: Measures temperature, whether it is how hot the sun is or how cold ice is.
  • Magnet: Used to explore magnetism and how it interacts with different materials.
  • Scale: Helps weigh objects or measure how heavy things are, like rocks or fruits.
  • Petri Dish: A small dish that grows tiny organisms like mold or bacteria.
  • Goggles: Protects your eyes during experiments—safety first!
  • Ruler: Measures lengths and distances, perfect for comparing plant growth or measuring objects.
  • Magnifying Glass: A classic tool for scientists to observe small details up close, like the veins on a leaf or the texture of a rock.
  • Stopwatch: Times your experiments, great for activities that involve observing changes over time.
  • Molecule Model: Helps students understand what molecules look like and how different atoms connect to form compounds.
  • Binoculars: A tool that helps you see things far away, great for outdoor exploration of animals or nature.

Hands-On Science Experiment Suggestions for Older Kids

Now that you know some essential science tools, let’s experiment! Here are some fun and simple science experiments you can do with these tools in a science lab.

Water Drop Microscope (Grades 2-5) Use a microscope to examine drops of pond water. What tiny organisms can you spot?
 
Science Tool: Microscope, Petri Dish
 
Ice Melting Experiment (Grades K-2) Measure how fast different materials (salt, sugar, sand) melt ice. Record your results using a thermometer and a stopwatch.
 
Science Tools: Thermometer, Stopwatch
 
Magnet Maze (Grades 3-5): Use a magnet to guide a small metal object through a paper maze. Explore how magnets attract particular objects. Construct a maze using straws, cardboard, and other materials as obstacles or follow lines drawn on paper.
 
Science Tool: Magnet, Ruler
 
Temperature Challenge (Grades 1-3) Use a thermometer to compare temperatures in different parts of your home or classroom. Find the warmest and coldest spots! Try our seasonal temperature challenge.
 
Science Tools: Thermometer, Ruler
 
Weight of Different Fruits (Grades 2-4) Weigh different fruits or vegetables on a scale. Which one is heaviest? Which one is the lightest? Predict before measuring!
 
Science Tools: Scale, Beaker
 
Mixing Liquids Experiment (Grades K-3): Use test tubes and droppers to mix water with liquids like oil, dish soap, or vinegar. Observe what happens to the liquids! Explore density!
 
Science Tools: Test Tubes, Dropper
 
Plant Growth Observation (Grades K-5): Use a ruler to measure how much a plant grows over time. Record your measurements in a science journal.
 
Science Tools: Ruler, Test Tube (for watering)
 
Molecule Models (Grades 3-5) Create models of different molecules using modeling clay or small balls to represent atoms. Use your molecule models to explain how atoms form compounds. Make this Atom Model.
 
Science Tool: Molecule Model

Special Tools for Preschool Science

Preschoolers love hands-on exploration, and while they may not need advanced tools, there are special science tools designed just for little hands to spark their curiosity.

  • Plastic Magnifying Glass: A simple, child-safe tool that lets young scientists get an up-close look at bugs, leaves, and rocks.
  • Kid-Sized Tweezers: These are perfect for small hands to pick up objects like seeds, pebbles, or tiny insects for observation.
  • Sensory Bottles: Sealed plastic bottles filled with water, glitter, beads, and other objects, allowing preschoolers to observe movement, color, and floatation mess-free.
  • Measuring Cups and Spoons: Great for water play, sand exploration, or simple science experiments where preschoolers can measure, pour, and compare quantities.
  • Color-mixing droppers: These droppers, filled with safe, colored water, help kids explore the concepts of color mixing and observation.
  • Binoculars: Lightweight and easy-to-use preschool binoculars allow kids to explore the outdoors and observe birds or clouds at a distance.
  • Simple Thermometer: A color-changing or easy-to-read thermometer can help preschoolers understand hot and cold concepts in weather or water play.
  • Observation Jars: Clear plastic jars with magnifying lids allow young kids to observe small objects they collect during outdoor exploration safely.

Hands-On Experiment Ideas for Preschoolers:

Color Mixing: (Ages 3-5) Use color-mixing droppers with water to blend primary colors and see what new colors appear! Science Tools: Color Mixing Droppers, Measuring Cups

Nature Observation: (Ages 4-5) Collect small nature items in observation jars or use a plastic magnifying glass to observe them up close. Kids can describe what they see.

Science Tools: Plastic Magnifying Glass, Observation Jar

Sink or Float: (Ages 3-5) Use measuring cups and different objects (like stones, leaves, or plastic toys) to explore what sinks and what floats in water.

Science Tools: Measuring Cups, Sensory Bottle

Outdoor Bird Watching: (Ages 3-5) Head outdoors with binoculars and observe birds or clouds. Kids can point out shapes, colors, and movements. Make a bird feeder and print our mini bird pack to get started.

Science Tools: Binoculars, Kid-Sized Tweezers (for collecting leaves or other small objects)

Magnetic Treasure Hunt: (Ages 3-5) Hide small magnetic objects (like paperclips or coins) in a sandbox or sensory bin. Let the children use magnets to “hunt” and pull the treasures out of the sand! Science Tools: Magnet, Kid-Sized Tweezers

 
Categories
STEM

8 Best Science Practices Article

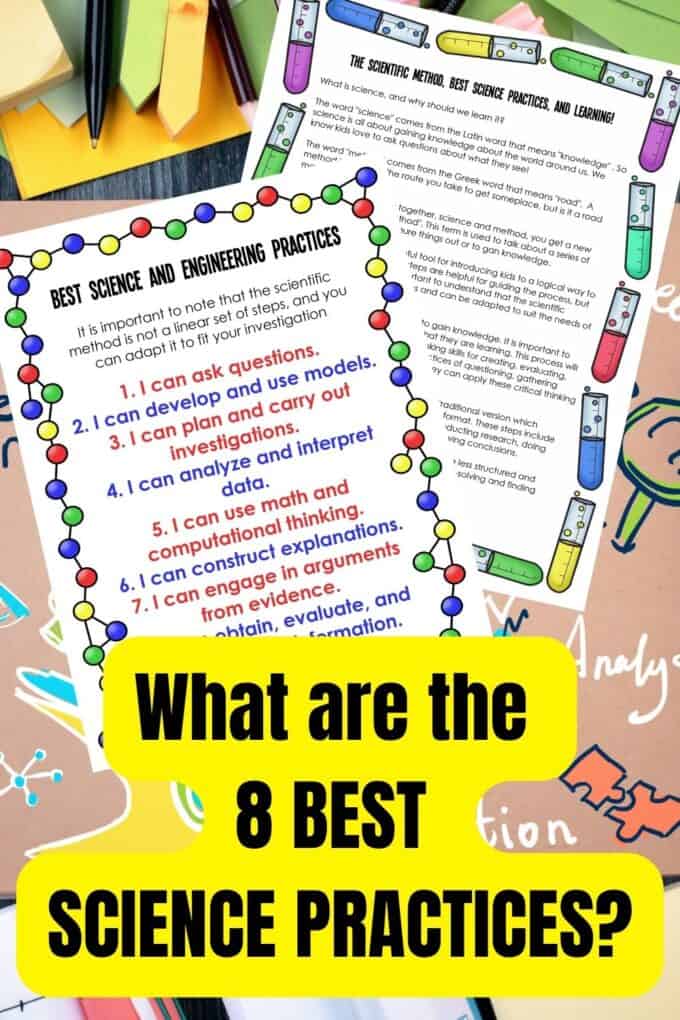
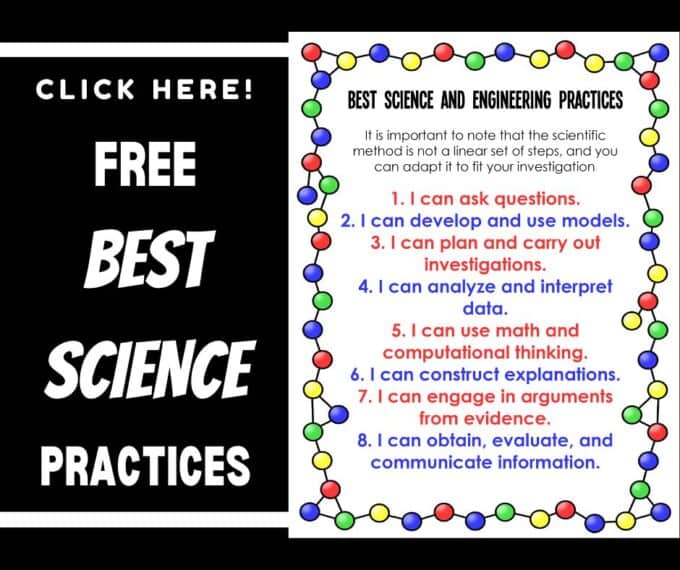
Another use of the scientific method can be seen here, along with the best science and engineering practices, which are a little less linear. Why don’t we dive in and take a look at the 8 science and engineering practices and examples of them?

WHAT ARE SCIENTIFIC PRACTICES?

The word “science” comes from the Latin word “knowledge”. So science is all about gaining knowledge about the world around us. But how do scientists come up with that knowledge? In a systematic way that involves lots of observation and experimentation!

The best science and engineering practices below are behaviors that kids can demonstrate as they develop an understanding of science topics and concepts.

They may look less structured than the traditional scientific method, and allow for a more freeflowing approach to problem-solving and finding answers to questions. However, these skills are critical to developing future engineers, inventors, and scientists!

It is essential to allow kids to use the practices with whatever they are learning. This process will encourage the use of higher-order thinking skills for creating, evaluating, and analyzing.

As kids develop the practices of questioning, gathering data, analyzing, and communicating, they can apply these critical thinking skills to any situation. Now that’s a winner!

* Note: You might be familiar with the more traditional scientific method, which includes some similar practices but in a linear format. These steps include asking questions, developing a hypothesis, conducting research, doing experiments and tests, analyzing data, and drawing conclusions.

8 SCIENCE AND ENGINEERING PRACTICES

ASKING QUESTIONS

Asking questions is an integral part of discovering and learning new things. In science, good questions help scientists discover more about the world and how it works.

Asking questions is a fundamental skill for kids to develop. When kids are curious about something, they ask questions. Introduce kids to science activities and themed science centers, and even go out into nature to stir curiosity about the world around them.

Teach kids to ask scientific questions. Scientific questions are defined, can be tested, and can be answered using data. Show kids how to develop good scientific questions by brainstorming possible questions and eliminating any that are too broad and can’t be tested.

The practice of asking questions can be informal, such as in class or small group discussions, or formal, such as written questions. See our questions for reflection.

DEVELOPING AND USING MODELS

Kids might think of models as smaller copies of real cars or planes. In science and engineering, models represent ideas, events, or processes.

Models can help explain complex ideas more simply. They are based on observations and current explanations about how things work. But because they are simplified, they can’t represent every detail. Good models can be tested and redesigned and used to improve predictions.

Maps, drawings, diagrams, 3-D structures, and physical models are examples of models kids may use to develop understanding.

PLANNING AND CARRYING OUT INVESTIGATIONS

Kids can practice planning and carrying out investigations with hands-on science activities that answer a question or test the solution to a problem. A simple plan may include a list of materials needed and the steps to be taken.

A more involved investigation will include identifying relevant variables and considering how they might be observed, measured, and controlled. Kids will need to think about how they will collect and record the data and the time frame needed for the investigation.

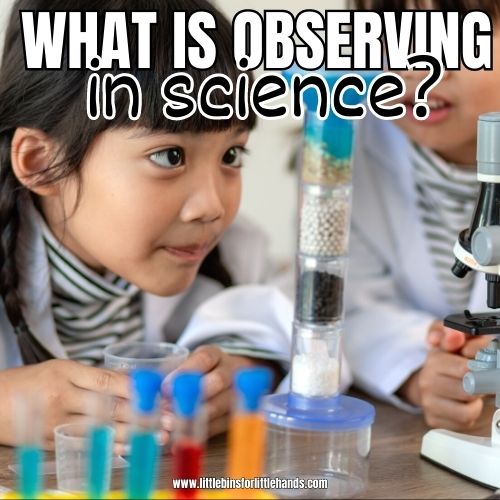
💡 Observation is a powerful science tool! Kids are naturally observant!

ANALYZING AND INTERPRETING DATA

Data are the observations and measurements that you collect to answer a question. Before they can be useful, though, data needs to be analyzed and interpreted. Data can be organized with tables, graphs, and other means to help reveal patterns or relationships.

When kids examine the data they have collected, they need to identify anything significant and anything that may be an error. Interpretations of the data are not facts or personal opinions but suggestions about what they mean.

USING MATH AND COMPUTATIONAL THINKING

Kids need to understand how math and computer programs are connected to observations, experiences, and ideas about the world around them. This begins with an awareness of mathematics in science.

Using math and computational thinking for kids can be as simple as recognizing and describing the number patterns they see around them. They can describe, measure, and compare quantities and record them in a graph. Then, they can use quantities such as area, volume, weight, and time to answer scientific and engineering questions and problems.

CONSTRUCTING EXPLANATIONS

You want kids to be able to form their explanations rather than just having the science content explained to them. Explanations can be communicated using words, pictures, and numbers; this will take lots of practice for many kids.

Teach kids how to construct explanations in science by getting them to write down what they are thinking. Start with a sentence about what they think the answer is. Then, state the evidence, which is exactly what they observed. Finish with the “because,” which is the scientific principles they have been learning about.

ENGAGING IN ARGUMENTS FROM EVIDENCE

Engaging in arguments is important for kids because it makes explanations or solutions much clearer. It also helps kids learn to differentiate between evidence and opinion and receive and respond to feedback from others.

Often, this process starts with a question, which may have multiple potential answers. Why do you think this is happening? Those possible answers are known as claims. The evidence comes in the form of observations or data, and kids need to work through the evidence that supports the different claims.

OBTAINING, EVALUATING, AND COMMUNICATING INFORMATION

Scientists and engineers must be able to gather information and communicate their findings. Scientific literacy for kids includes finding out, evaluating, and communicating scientific information. Information can be gathered from age-appropriate texts like teacher-recommended STEM, engineering, or science books, videos, and media.

Communicating information can happen in multiple ways. Kids could use words, diagrams, graphs, images, models, interactive displays, discussions, or oral presentations. Provide lots of opportunities for kids to talk about their learning and present their findings differently!

CLICK HERE TO GET YOUR FREE SCIENCE PRACTICES PRINTABLE

SCIENCE VOCABULARY

It is never too early to introduce some fantastic science words to kids. Get them started with a printable science vocabulary word list. You’re going to want to incorporate these simple science terms into your next science lesson!

WHAT IS A SCIENTIST

Think like a scientist! Act like a scientist! Scientists like you and me are also curious about the world around them. Learn about the different types of scientists and what they do to increase their understanding of their specific areas of interest. What Is A Scientist

SCIENCE BOOKS FOR KIDS

Sometimes, the best way to introduce science concepts is through a colorfully illustrated book with characters your kids can relate to! Check out this fantastic list of teacher-approved science books, and get ready to spark curiosity and exploration!

Check out our recommended book lists:

Categories
STEM

Material Properties Activities

Ever wonder why a sponge soaks up water or why metal feels cold to the touch? The everyday materials around us behave uniquely because of the materials they’re made from. Let’s explore material properties activities with simple experiments and free worksheets.

Hands-on Science Investigations: Materials
These activities explore how materials can be absorbent, waterproof, strong, soluble, or flexible and how these properties affect their use in construction, design, and everyday objects. Understanding these properties is a key part of learning about earth sciences and how materials, whether natural or man-made, play a role in our environment.

Note: Material properties are also a central topic in Chemistry. However, the focus is more on their molecular structure.

Material Scavenger Hunt: Students search their home or classroom for objects that fit specific material properties, such as absorbency or hardness, and write down what they find next to each property. This adds a layer of practical exploration and connection with everyday objects.
 
Sugar Cube Absorption Experiment: This experiment tests the absorbency of sugar cubes when exposed to water and various materials, extending the study of absorbency from previous activities.
 
What Absorbs? Experiment: Use fabric, plastic, and paper towels to test different materials to see which absorb the most water. Have students predict, experiment, and record which material holds the most water. This is an excellent follow-up to the absorbency worksheets.
 
What Absorbs Heat Better? Experiment: Kids explore how different materials absorb heat at different rates by placing them in sunlight or near a heat source. Materials like metal, plastic, and fabric will warm up at different rates. Students can observe which materials retain the most heat and relate this to everyday uses.

What are Observable Properties?

Observable properties are characteristics of a material or object that can be identified and measured using our senses without needing special tools. These properties help us describe and understand what an object is made of and how it behaves. Some common observable properties include:
  • Color – What color is the material? For example, wood is usually brown, while metal might be shiny or silver.
  • Texture – How does it feel when you touch it? A surface could be smooth like glass, rough like sandpaper, or soft like fabric.
  • Shape – What shape does the material take? Is it round, square, or something else?
  • Size – How big or small is the object or material?
  • Flexibility – Can the material bend without breaking? For example, a rubber band is flexible, while a pencil is not.
  • Hardness – How hard or soft is the material? A rock is hard, while a sponge is soft.
  • Transparency – Can you see through the material? Glass is transparent, but wood is opaque.
  • State of Matter – Is it a solid, liquid, or gas?

Printable Material Properties Activities Include:

Grade Level Recommendation: These activities are ideal for Kindergarten -3rd grade. 
 
Properties of Materials Chart This worksheet introduces key properties of materials, such as absorbency, flexibility, water resistance, and strength. Students will explore how materials can be categorized based on these characteristics.

Simple Science Experiment. Testing Absorbency Kids test the absorbency of fabric, paper towels, and plastic materials. They predict which material will absorb the most water and record their findings.

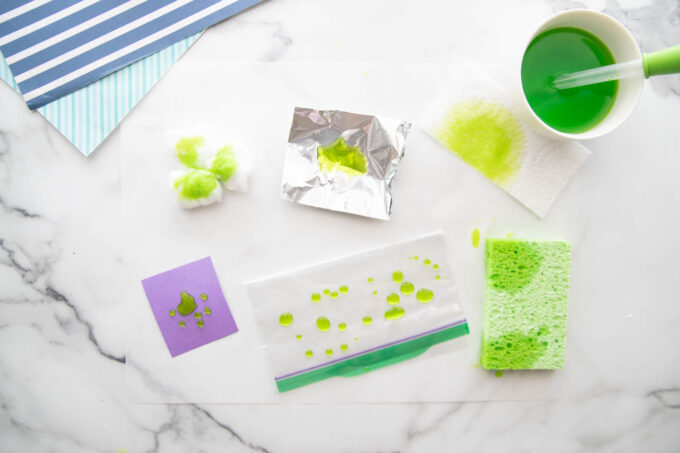
What absorbs and what does not? Simple experiment with various materials laid out and water bowl with pipette to test and observe.
Sort the Materials Students sort pictures of different materials based on their properties (e.g., absorbent, waterproof, flexible, rigid).
 
Match the Property In this activity, students match objects with their correct material property, such as matching a sponge with “absorbent” or a steel beam with “strong.”
 
What Is It Made Of? Students identify what materials everyday objects are made of and explain why those materials were chosen.
 
Material Scavenger Hunt Students go on a scavenger hunt to find objects that match different material properties (e.g., absorbent, flexible, hard, smooth, heavy, etc.). They record their findings in a checklist.

Try It: Material Investigation (Paper Towel Test). Students compare different paper towel brands, measuring how much water each absorbs. They record their results and reflect on the effectiveness of each.

Material Properties Crossword: A fun crossword puzzle where students fill in the blanks using material property words such as absorbent, waterproof, and flexible.

Challenge: Design a Waterproof Shelter. Students are challenged to design and build a waterproof shelter for a small object using aluminum foil, plastic wrap, and paper towels. They test the shelter by spraying it with water and reflect on its success.

True or False: Material Properties This activity allows students to identify true or false statements about material properties, such as “Metal is flexible” or “Plastic is strong.”

Free Activity: Material Properties Pack

Use this free materials project pack to learn more about the properties of materials.

More Printable Activity Ideas

  • Natural vs. Man-Made Materials Worksheet: Students sort materials into categories based on whether they are natural (like wood or cotton) or man-made (like plastic or nylon), complementing the scavenger hunt and material sorting activities.
  • Recyclables Activity Pack: What materials can be recycled and what can not? This is a simple but engaging pack for young scientists to explore recyclable materials.